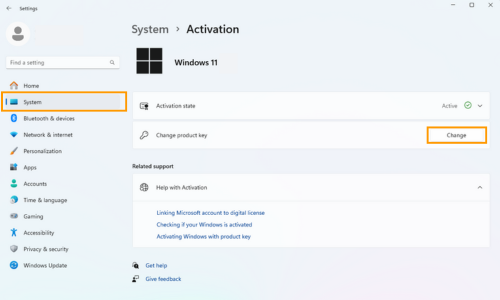
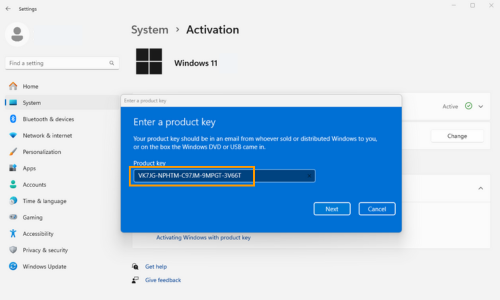
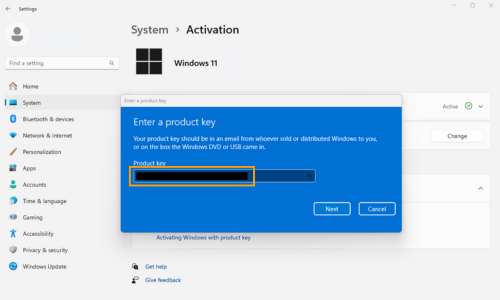
Are you using Windows 10 or 11 Home and want to switch to the Pro version? Although you have a valid licence key, you get an error message during online activation? This is because Windows currently only recognises the installed Home edition and therefore cannot activate the Pro key. Therefore, the Pro version must first be installed locally and only then activated. We will show you how this works very simply in our instructions.

Upgrade from Windows 10/11 Home to Pro

How the upgrade works
1. Disconnect from the Internet
The local update to the Pro version only works offline. So first simply unplug the network cable or disconnect the WLAN connection.
2. Open the activation menu
Open “Settings” and select “System” in the left-hand menu. Now scroll down a little and click on “Activation”. Select “Change product key” and click on “Change”
3. Enter upgrade key
Enter the following general upgrade key:
VK7JG-NPHTM-C97JM-9MPGT-3V66T
This key is identical for all users. It is only used to install the Pro version. The product is not yet activated. You will need your licence key for this (see step 6).
4. Perform upgrade
Click on “Next” to start the upgrade to the Pro version
5. Enter your personal licence key
Once the installation is complete, reconnect your computer to the Internet. Navigate again to “Settings” > “System” > “Activation”. There, click on “Change product key”.
6. Activate Windows 10/11 Pro
Now enter the licence key you received from us and click on “Next”.
7. Finalise activation
A final click on “Activate” completes the upgrade. Your Pro version is now activated and ready to use

Upgrade from Windows 10/11 Home to Pro

What does Microsoft support end mean?
